Setup your email:
Note: If these settings fail for incoming mail try changing the Server Name from mail.bigpond.com to pop3.live.com or pop3-mail.outlook.com
Note: If these settings fail for outgoing mail try changing the Server Name to smtp.live.com using port 587 and STARTTLS with normal password

Click above to open Telstra Webmail if you wish to check your email password and current emails
Telstra setup instructions:
1. Open Complete Mail
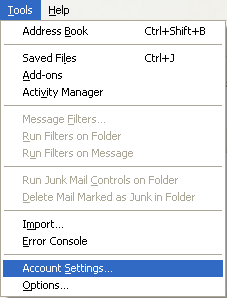
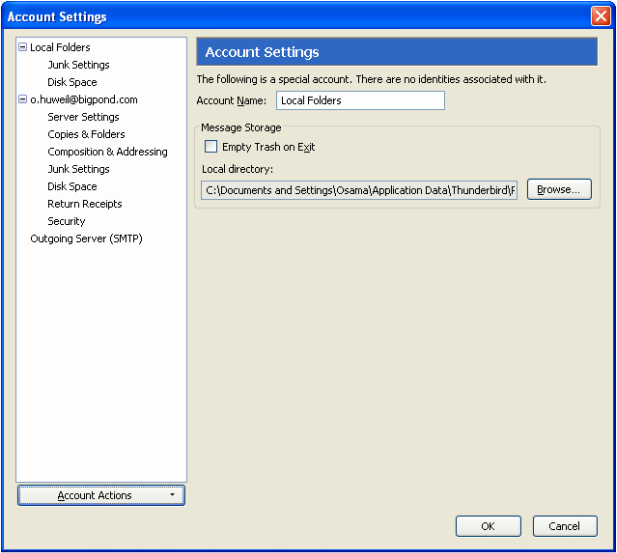
2. Click on Tools > Account Settings
2. Click on Tools > Account Settings
3. Make sure you have deleted all accounts + any other SMTP server settings
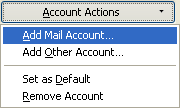
4. Under Account actions, click on Add Mail Account
4. Under Account actions, click on Add Mail Account
5. Type in the following:
Your name: John Smith
Email address: [email protected]
Password: *******
Your name: John Smith
Email address: [email protected]
Password: *******
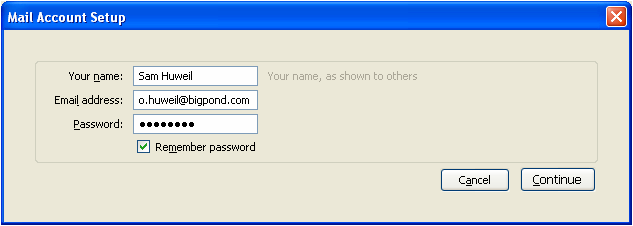
6. Click Continue
7. Make sure you click Radio button IMAP then click Create Account
Hint: If the information below does not automatically populate for you, you can enter them manually by clicking on the Edit button then you can type in the information manually
7. Make sure you click Radio button IMAP then click Create Account
Hint: If the information below does not automatically populate for you, you can enter them manually by clicking on the Edit button then you can type in the information manually
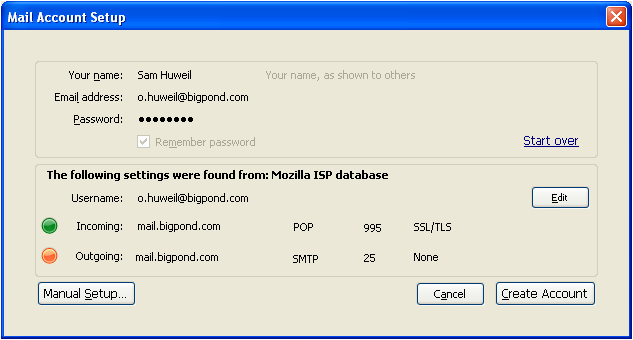
8. Click OK
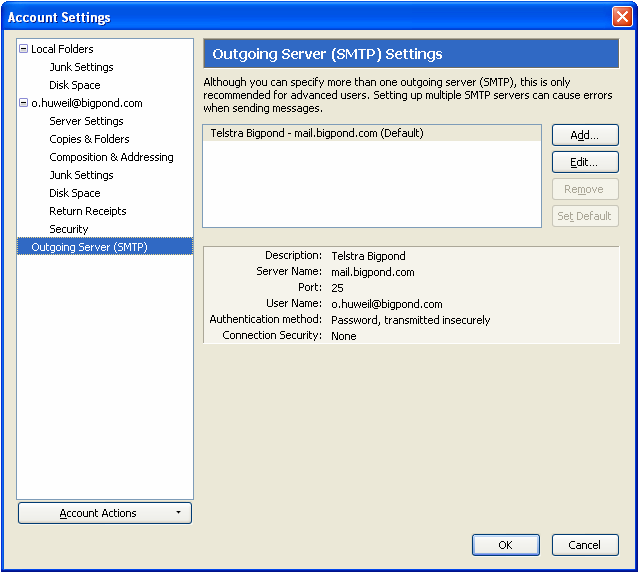
9. Now I need you to make sure that the correct SMPT server is selected
as your default server. You can double check this by clicking on Tools > Account Settings and clicking on Outgoing Server (SMPT) and make sure that Telstra Bigpond – mail.bigpond.com is set to default then click OK
10. You have now successfully created your TELSTRA email account using Complete Mail!